 1
1Date: April 30, 2011 Location: R Mountain Time: 4:45 pm F/4.0 1/640
 2
2Date: April 30, 2011 Location: R Mountain Time: 4:42 pm F/3.5 1/60
 3
3 4
4Date: April 30, 2011 Location: R Mountain Time: 4:38 pm F/3.5 1/200
 5
5Date: April 30, 2011 Location: R Mountain Time: 4:59 pm F/3.2 1/1250
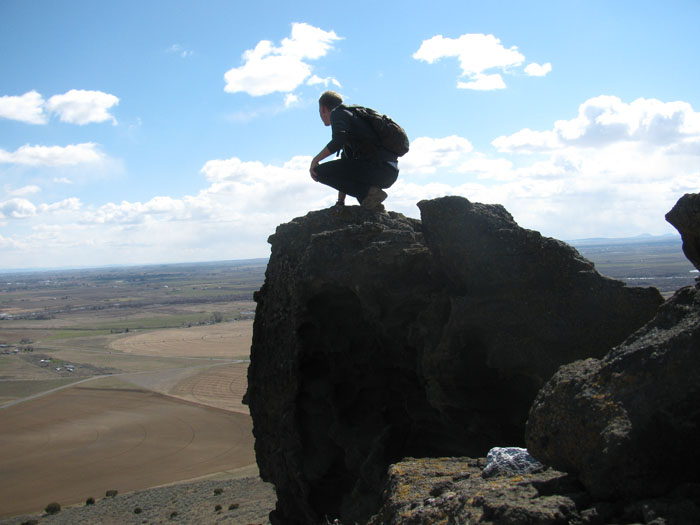 6
6Date: April 30, 2011 Location: R Mountain Time: 4:45 pm F/4.0 1/1000
 7
7Blending Photos:
1-On this photo i had my friend stand on a rock above me, he was about 10 above me. I then got close to the rock face and zoomed up to focus on my friend. When i zoomed in, it created a very cool blur on the rock face that was closet to the camera.
2-This photo i was look specifically for textures for this project. This rock with all its different colored moss, was in a dark shadow, so i turned down my shutter speed to 1/60 to bring in more light.
3- This is the final product of photos one and two blended together. I started with the picture of my friend then placed the rock photo on top. I then selected the green color channel and turned down the opacity of the photo down to 57%. i added a blending mask and using black and white paint i blending the rock more into the sky and made the subject free from the texture.
4-Another texture shot, i used macro focus and got really close to the log to get this clear shot.
5-On this photo i found a stick and started playing with extreme back ground blur. i used my friends to create a interesting background color for my close up of the stick. I i used zoom and macro focus to get the blurred background and clear foreground.
6-This photo was taken on a 10 second self timer. I wanted to get a shot of my self on this cliff, i knew that they sun was really bright so i turned up my shutter speed to 1000, to let in less light.
7- So on this Blending images and using type photo, i wanted to create a scene from our saturday adventure. i started with the image of the stick and placed the photo of me on the cliff and reduced the opacity. I placed a mask over those photos and blended the mountain photo into the background. I really wanted to make sure the stick stayed exactly was it was taken, so that i could create some depth in the photo. I then placed the wood photo on next, at a low opacity as well. I added a blending mask and went to work with my black and white paint. I tried a few different ways of showing the texture in the picture, but i finally decided to us the texture just on the rocks that i was kneeling on. I then used the eye dropper to pick a color from one of the images and used that for the text color. I simply choose the word "adventure" because it describe the scene the best.
No comments:
Post a Comment