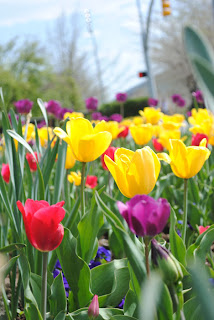
Canon Power Shot SX110SI, Location: BYU
Date: May 7, 2011 Time: 3:15, F/2.8 1/800
Nikon D3000, Location: BYU
Date: May 7, 2011 Time: 3:05, F/7.1 1/200
Nikon D3000, Location: Logan Ut
Date: May 7, 2011 Time: 10:13, F/8 1/400Smart Editing
1-Image one i started by using the saturation adjustment layer. i boosted the hue to +12 and the saturation to +24 and brought down the lightness in the photo. I wanted to make sure the flowers looked as rich as they could be. I then used a levels adjustment layer and evened out all my levels. Then i copied the background layer and converted it into a smart object and added a gaussian blur to create more blur in the photos background. Then using the mask that comes with the layer i took the affect away from the bee and the surrounding flowers. I then used smart sharpen to make the bee more in focus.
2- On these tulips i created a black and white adjustment layer. I increased the yellows and reds in the photo and brought down the greens to give it a greater range of black and white values. Then using the mask i painted black paint on to the image, and brought back all the color just to one flower, to give the image a main focal point.
3-For this wild flower photo i got a great shot with lots of blur like i wanted. I loved the color and balance in the photo so i chose not to use and saturation or levels to change the look of the shot. So i chose to use a black and white adjustment layer. I didnt mess with any of the colors i left them as they were. I just used the mask to bring the color back to the flower and the stick it was resting on.


I love your shallow depth of field on your flower shot. This is a great image, Nice work today!
ReplyDelete